How to Take Good Hoof PhotosTaking good hoof photos is crucial to getting a good evaluation of your horse's hooves. Studying good hoof photos will help you learn more about the health of your horse's hooves and how to spot problems before they occur. Step One: Choose the Right AreaMake sure that you have a good location to take your photos. You need a fairly firm (so that the hoof doesn't sink into it) and flat surface. Lighting is also important - try to avoid an area where there is direct sunlight such as an open doorway of a barn, or in a very dark corner, as they don't make for good hoof photos. Natural, even light is best but using a flash also works (just be sure to check your horse is ok with the flash going off before you attempt to shoot the hooves, else he might end up in your lap!). Step Two: Clean the AreaSweep the area clean or lay down a board or rubber mat on the floor. Any shavings or hay left on the floor will cause you problems as the camera will focus on them and make your hooves look blurry. Step Three: Clean the HoofClean the hooves thoroughly. Pick them out and use a wire brush to thoroughly clean out all the cracks and crevises. If the foot still looks dirty then try soaking in warm water for a few minutes and then scrub with the brush to get rid of every spec of dirt. Then thoroughly dry the foot with a towel. Step Four: Re-clean the AreaThis step may seem repetitive, but be sure not to skip it. Even one small lump of mud can get in the way of good hoof photos. |
Learn More About Hooves
Learn how to evaluate your horse's hooves Learn how to take good hoof photos Learn how corrective hoof trimming can restore soundness Learn how to figure out hoof problems and get a photo consultation Learn how poor hoof form can lead to navicular Learn about correct break over |
Step Five: Taking the Good Hoof Photos
There are seven main hoof shots that I like to take. Remember for the majority of these shots the camera needs to be on the ground, otherwise there will be distortion. If you have any specific problems with the hooves you can also include additional photos of them.
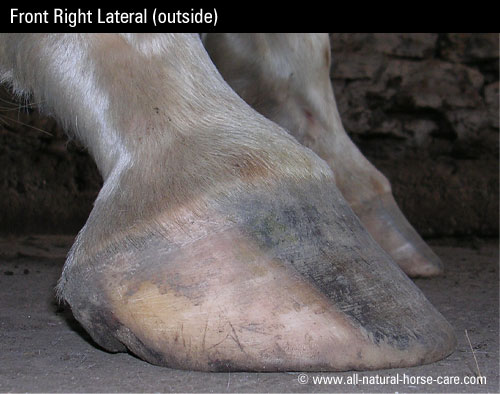
Lateral Hoof Photo
Lateral shot - taken from the side of the hoof with the camera on the ground and aiming the lens at the middle of the hoof. The camera must be parallel to the leg and try to include the short pastern bone so that the angle can be assessed.
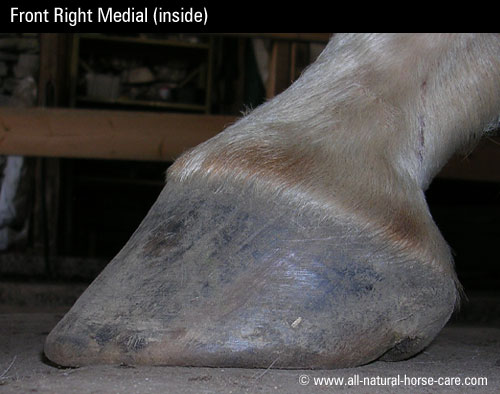
Medial Hoof Photo
Same as the lateral shot but taken from the opposite side of the horse so you are viewing the inside side of the hoof.
You will need to either lift the other hoof out of the way for this shot, or place it slightly ahead or behind the hoof you are photographing.
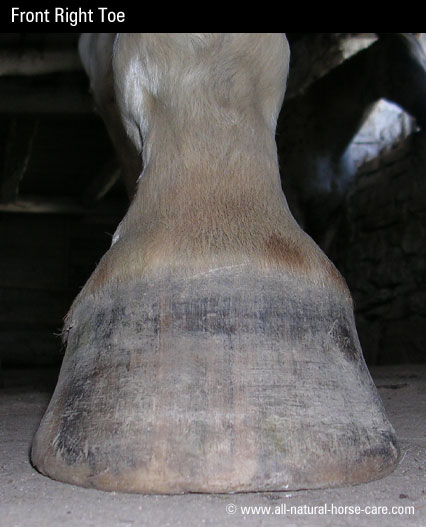
Front of Hoof Photo
Again, taken with the camera on the ground and aiming the camera lens at the middle of the hoof. Make sure the horse's leg is as square over the hoof as possible.
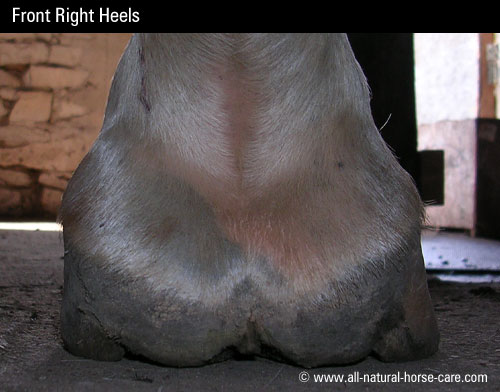
Heels Photo
Again, taken with the camera on the ground and aiming the camera lens at the middle of the hoof. Make sure the horse's leg is as square over the hoof as possible.
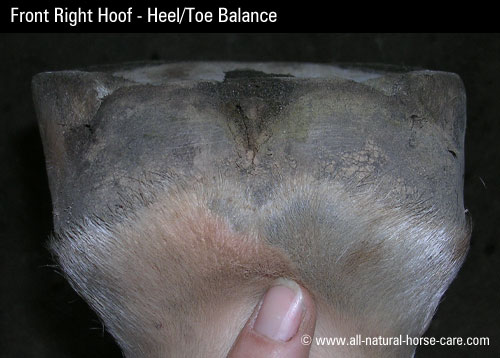
Heels in the Air Photo
This one is a little trickier to take as you need to hold the hoof whilst taking the photo. I suggest you practise this without the camera first as you need to teach your horse to relax the hoof without him trying to put his foot down. The way I do it is to hold the pastern in my left hand with my thumb gently pressing into the back of the pastern. Encourage the horse to relax the leg and let the hoof hang down. The first couple of times you try this the horse will probably think you want him to put the hoof down, so be patient. Gently rotating or wiggling the leg will help it to relax. Once you and your horse are comfortable with this you can then line the camera up with the heels and move it backwards and forwards until you can just see the toe slightly as well. I suggest you take a few shots in varying positions to ensure you get it right, as this is a very useful shot for assessing overall balance.
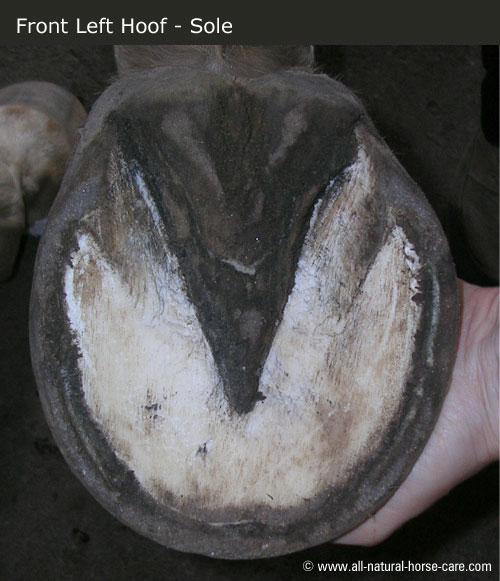
Sole Photo
Also a little trickier, as you need to hold the hoof whilst taking the photo, but easier than the last one! Hold the camera parallel to the hoof and try to keep it fairly square on too. Make sure you include the heel bulbs.
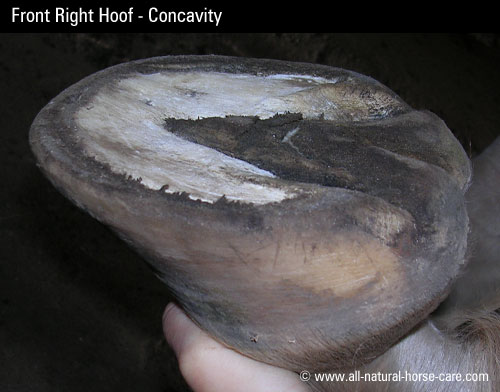
Concavity Photo
Again, a tricky one but it's a nice shot to illustrate concavity. Hold the camera about 8 inches above and to the side of the hoof at an approx 45 degree angle. Again, experiment a bit and take a few shots to be sure to get a good one.
Step Six: Body Photos
When taking good hoof photos it is also useful to have the following body shots of the horse as they can indicate how comfortable the horse is with his feet.
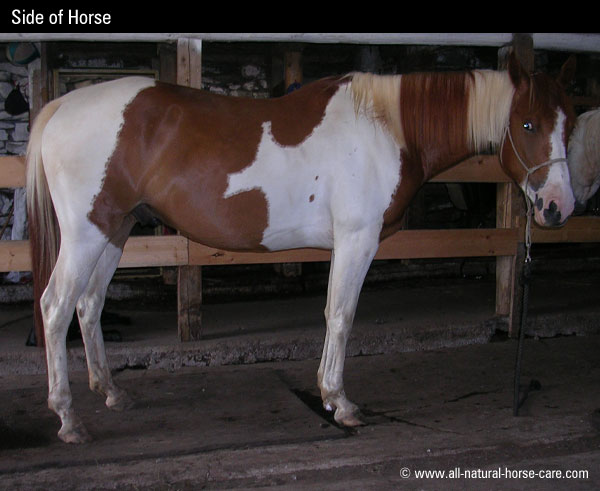
Side of the Horse Photo
Taken from the side with the horse stood in his/her normal position, ie don't stand him/her up square just for the photo.
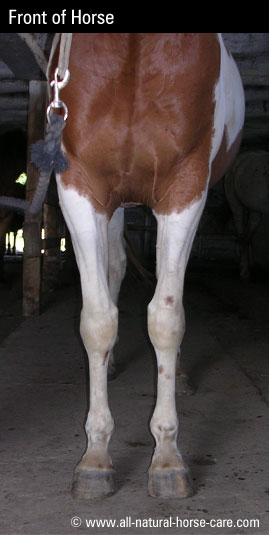
Front & Rear of the Horse
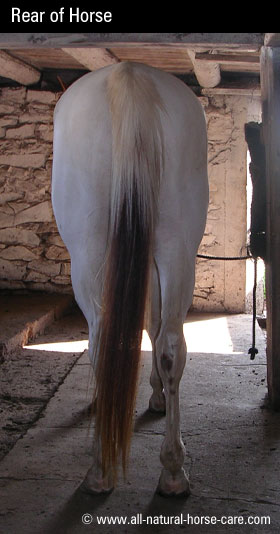
Taken from directly in front and behind with the horse stood in his/her normal position, ie don't stand her up square just for the photos.
Try to get the shot when the tail is central, so that both legs can be clearly seen. Monty moved his tail at the last minute in this photo. You can also tie the tail up in a loose knot to keep it out of the way.
Want this article in a printer friendly format?
Click here to download it as a pdf.