Toe Rocker - adjusting the break over point on a horse's hoof
The application of a toe rocker or bevel to a hoof improves break over and encourages a tighter connection between the hoof wall and coffin bone.
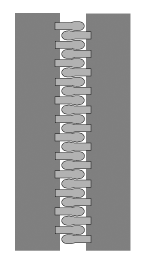
In a healthy hoof the hoof wall is tightly attached to the coffin bone. The coffin bone and hoof wall both have structures called laminae attached to them and these laminae interlock with each other to form a very tight bond - imagine the bond as a closed zipper or a velcro fastening.
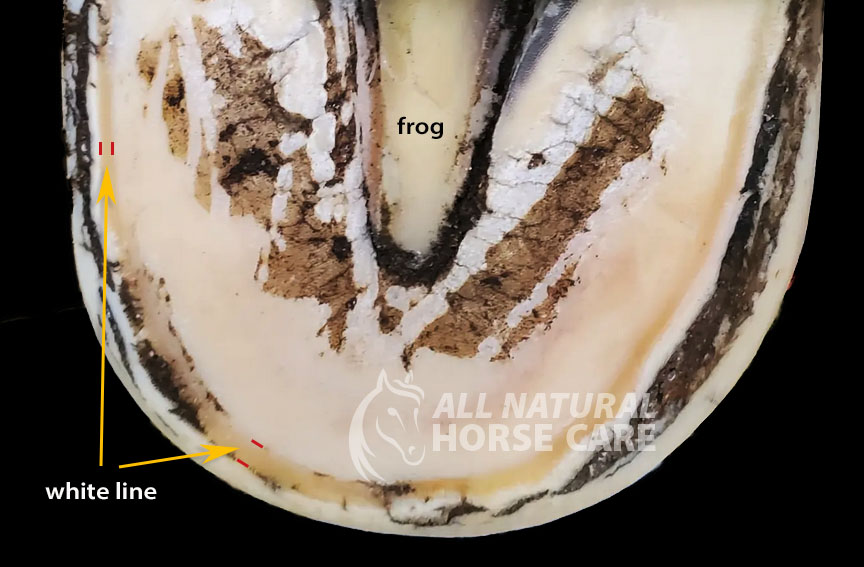
As the hoof wall and sole grows down and away from the bottom edge of the coffin bone the old laminae form the white line which is visible when looking at the sole.
When there is a tight connection the white line will be approx 2-3mm wide.
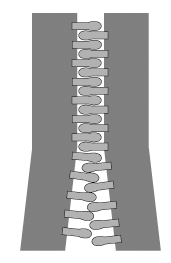
If the connection between the hoof wall and the coffin bone is compromised this will be reflected in the white line which will be wider - the bottom of the zipper is now starting to open. The wider it is, the worse the connection.
The photo below illustrates this nicely. Look at the thickness of the white line at the side of the sole compared to at the toe. This points to the break over being too far forward and the resulting extra toe length is causing mechanical separation of the laminae. This hoof has other issues too, mostly as a result of a poor trim – there has been way too much trimming of the sole and not enough attention paid to the walls – but the over-trimming does allow us to see weakened lamellar connection.
A harder to spot variation of this is when the sole stretches forward and hides the stretched white line, making it appear to be healthier than it really is. However, there are two ways to double check if this is the case with your horse.
- The first is to look at the angle of growth of the wall at the toe. Is the angle tighter (steeper) at the top than the bottom? If it is then the white line is stretched. (See second set of illustrations below - the dotted green line shows the change in angle.)
- The second is to look at the sole. Is there a ridge around the toe and then a gap between the ridge and the hoof wall? If so you probably don't have a really tight connection.
Achieve a better break over through using a toe rocker
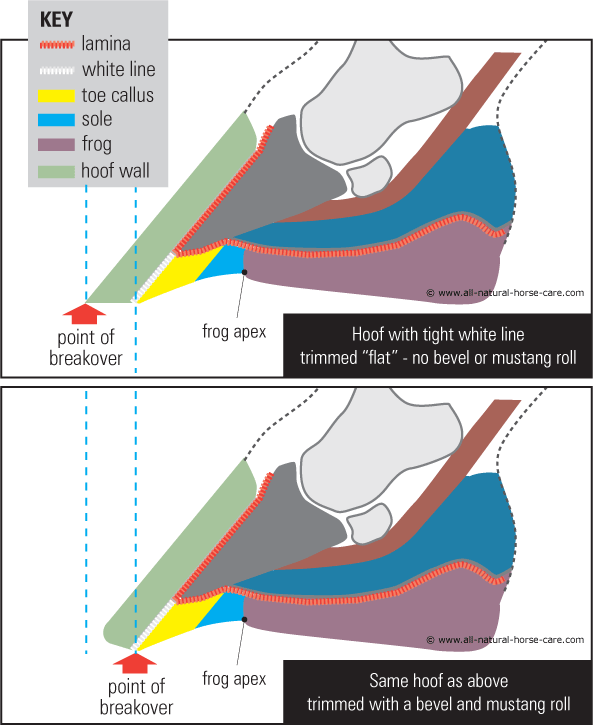
The hoof is designed to break over in a position that applies the least amount of stress on the laminar connection. This point, on a healthy hoof, is at the outer edge of the toe callus.
Therefore the point of break over on a healthy hoof should begin at the white line. Any further forward and the laminae will be stressed.
This diagram show the difference between a traditional farrier trim, (top) where the hoof wall is trimmed flat, compared to a barefoot trim (bottom) where the bevel and mustang roll have been applied. Notice how much farther back the barefoot trim brings the point of break over - reducing the stress on the laminar connection.
Using a bevel or toe rocker is even more important when dealing with a horse that has laminitis and rotation with a stretched white line.
In this diagram the top hoof shows how far forward the toe can get with a regular "flat" shoeing trim.
The bottom hoof shows how it is really important to start the rocker at the back (the side closest to the sole) when you are dealing with a stretched white line. If you apply it starting at the front edge of the white line the break over will still be too far forward and the wall will continue to be pulled away from the bone.
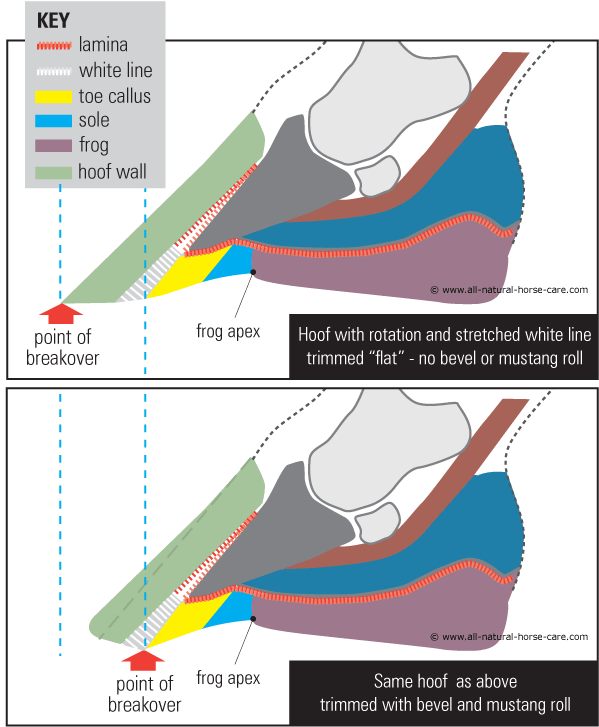
When applying the toe rocker to improve break over however, you must be very careful not to rasp into the toe callus else you will lower the height of the toe (measured vertically from the hairline at the toe to the ground). The start of the break over should be just in front of the highest point of the toe when looking at the sole and should angle out at approx 30 degrees.
Trimming a toe rocker into a hoof with a stretched white line
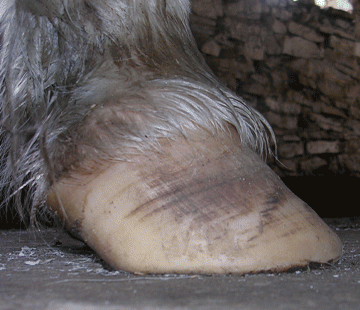
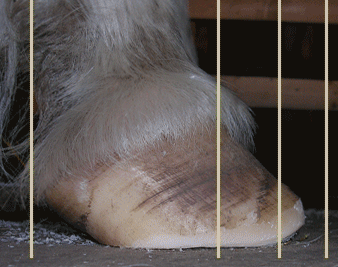
This is a lateral view of the hoof prior to trimming.
The hoof looks long overall but this view doesn't really reveal too much toe flare.
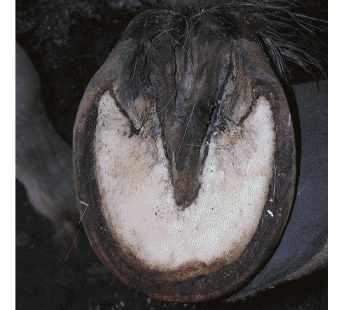
However when we turn the foot over we can see that there is quite a bit of stretching of the white line and the overall shape of the hoof is too oblong which indicates that the breakover is too far forward at present.
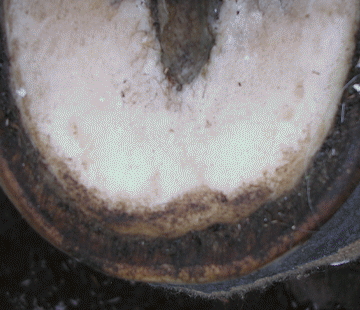
Here is a close-up of the stretched white line (which on this pony is actually very dark brown in colour). Notice the gap between the sole and the wall with the stripes in between? That is stretched white line. See also how the sole has been pulled forward too - especially in the bottom left hand side of the photo.
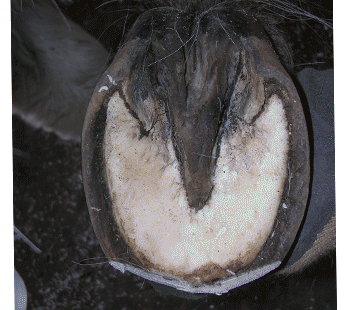
In this photo I have used the nippers to bring the toe back to the inside edge of the white line. This is done between the 11 and 1 o'clock positions on the hoof which preserves the height of the toe pillars at 10 and 2 o'clock.
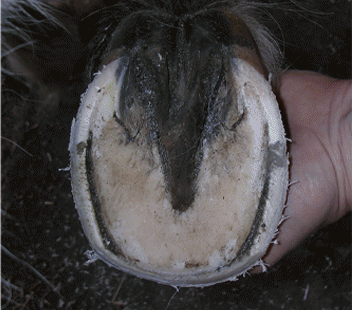
Here I have trimmed the rest of the hoof wall down to the level of the live sole.
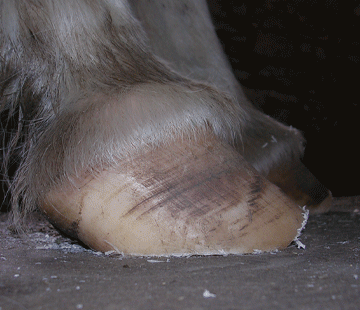
Here is the lateral view of the trim so far.
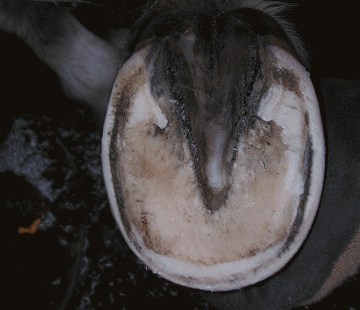
This view shows how the bars have been lowered so they are passive to the hoof wall. I have also applied the mustang roll to smooth off the walls and improved the breakover further with a toe rocker. Notice again how the toe rocker does not affect the toe pillars thereby retaining full toe height.
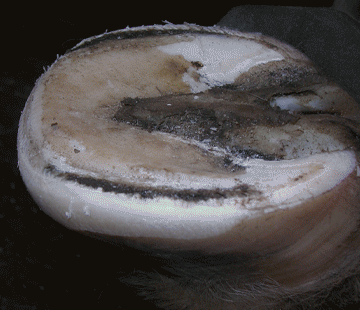
Here's another view of the finished trim.
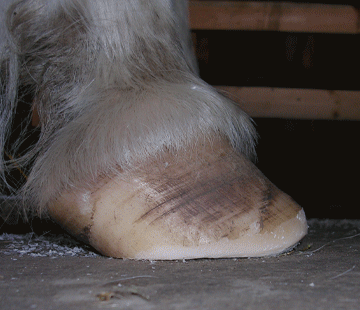
Here's the side view of the finished trim.
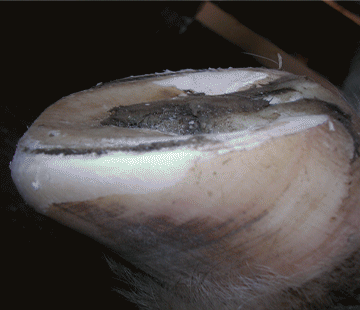
Here's another view of the finished trim.
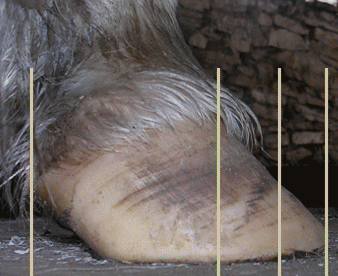
Here is a comparison of the before and after photos of the hoof. Note how far back the toe rocker has brought the break over.
Before.
Note how far back the toe rocker has brought the break over.
After.